After restoring my Model 1871/84 Mauser which had mold ingress issues, I’ve decided to also completely strip-down and clean the bolt too. While the bolt is relatively clean with only a little dried oil, it’s important that I don’t risk reintroducing mold into the rifle again. There are actually a number of different methods to disassemble one of these bolts but this is the way I like to do it. Hopefully the below will help others needing to disassemble their bolt.
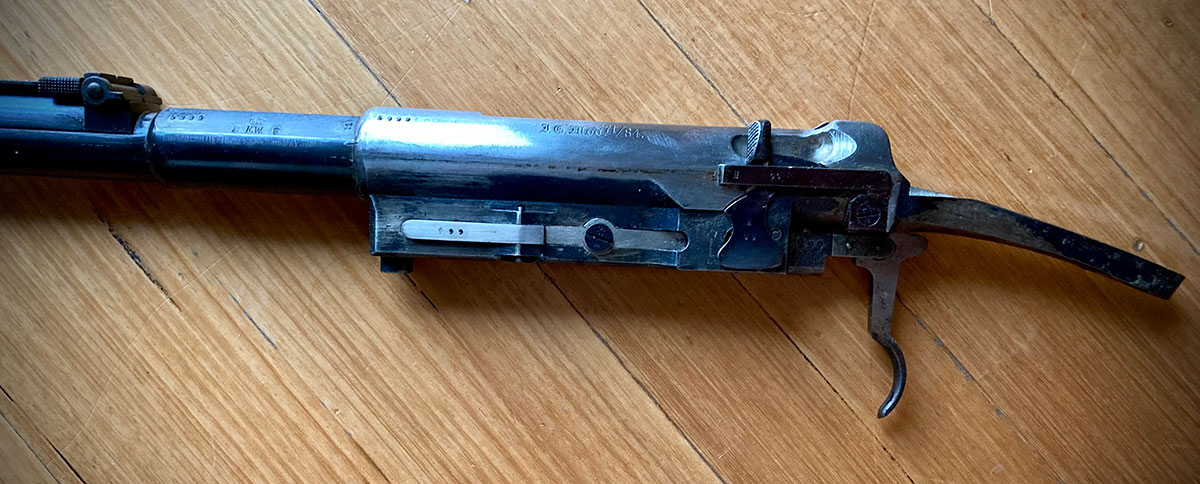
Step 1 – Removing the bolt from the rifle
You’ll need to losen the large screw on the top of the bolt but note DO NOT try and remove it from the bolt. It’s pinned in-place and you could break it if forcing too hard. When removing the bolt, you’ll need to lift the washer up that the screw is retaining, pull the trigger to drop the sear and also place the magazine cut-off in the middle. It may take a little wiggling of that lever to get the bolt to slip out.
Step 2 – Remove the end nut
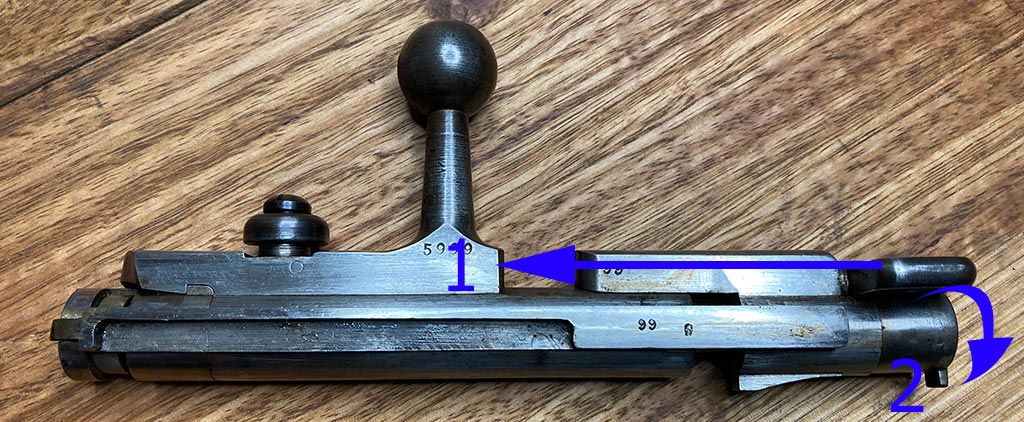
To start the disassembly, you’ll need to put pressure on the safety lever by pushing down against the spring tension in the direction (1) of the front of the bolt. At the same time, you’ll then need to unscrew the end nut (2). It may take several turns before you can release the pressure on the safety lever. Remove once unscrewed.
Step 3 – Remove the safety lever
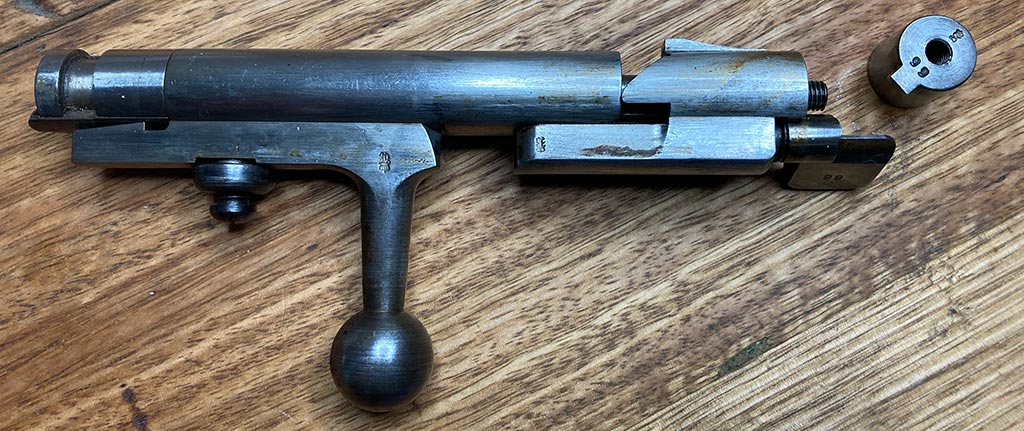
Once the end nut has been removed, you can remove the safety lever and its spring.
Step 4 – Remove rear bolt section
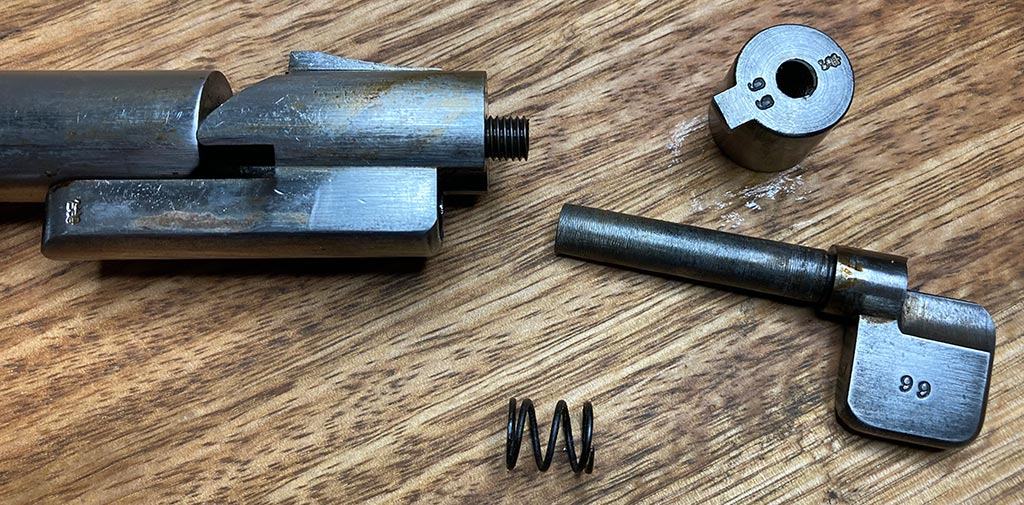
When the safety has been removed, then remove the rear bolt section by sliding off.
Step 5 – Remove the bolt head assembly
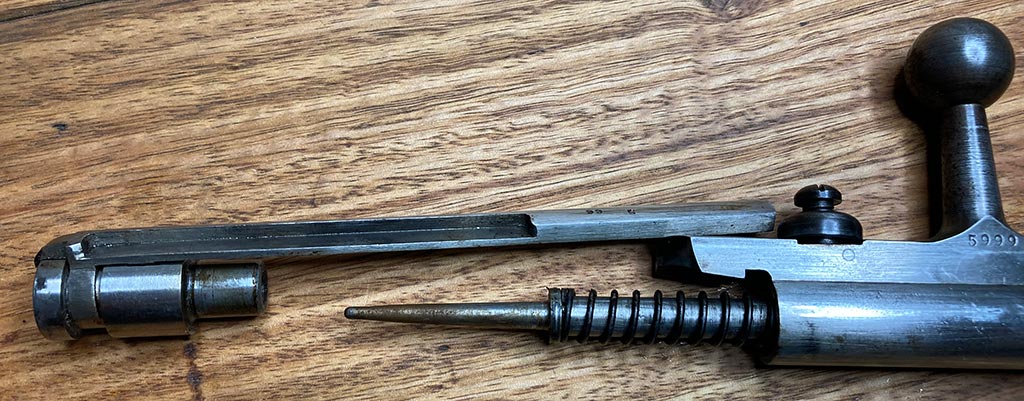
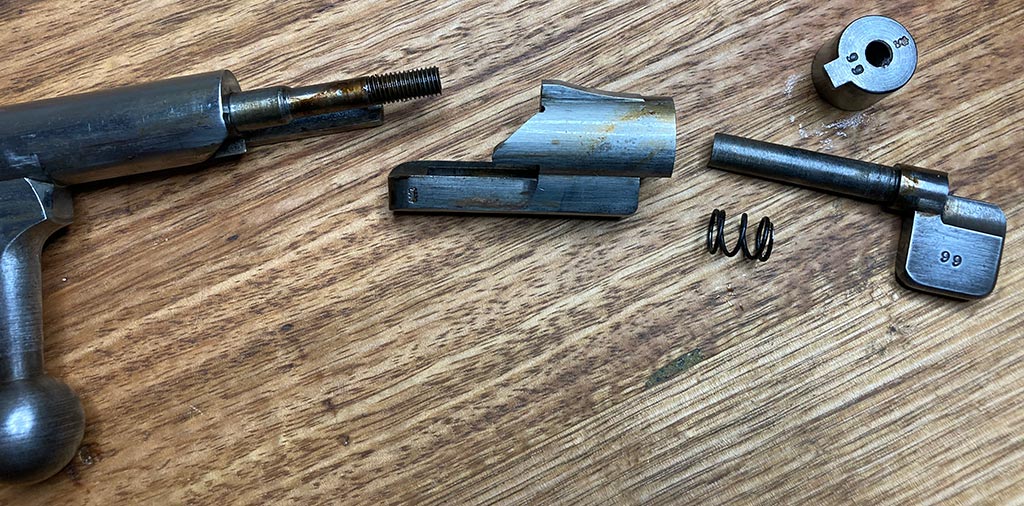
The bolt head assembly can then be removed from the front of the bolt. Just slide if off. Step 5, 6 and 7 can also be done at the start of the disasembly but I prefer to protect the firing pin while removing the rear section plus having the front on gives more to grip when pushing down on the safety lever.
Step 6 – Remove the ejector from bolt head
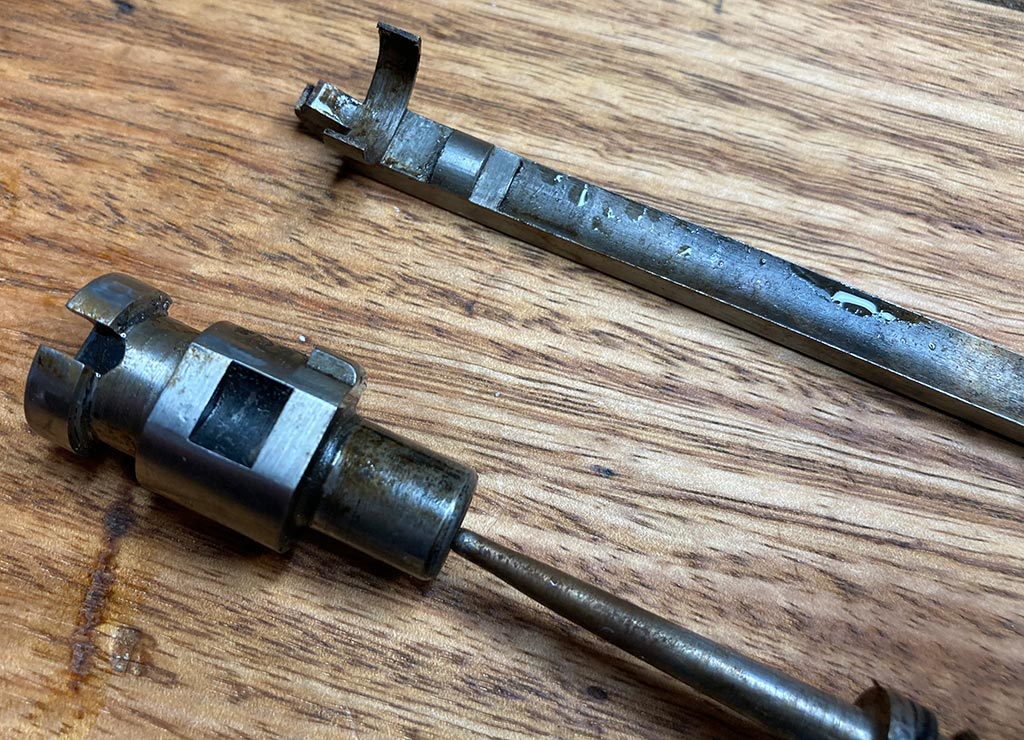
Next just pop the long ejector off from the bolt head. There’s a U-spring clip that holds it on in a groove near the front of the bolt head. Just be gentle and make sure not to break anything when removing.
Step 7 – Remove the extractor from bolt head
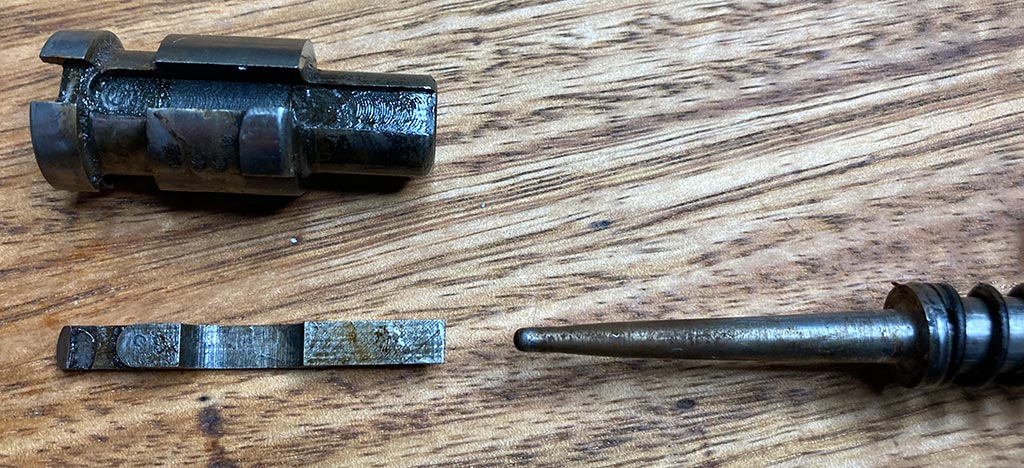
The extractor should just pop out of its recess at this point.
Step 8 – Remove firing pin
The firing pin and spring can now be slid out of the main bolt body.
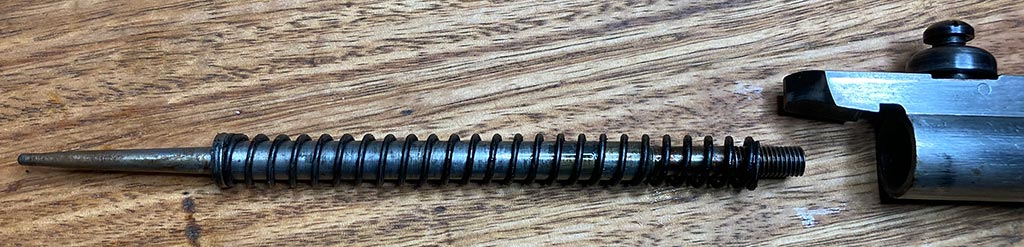
Step 9 – Remove firing pin spring

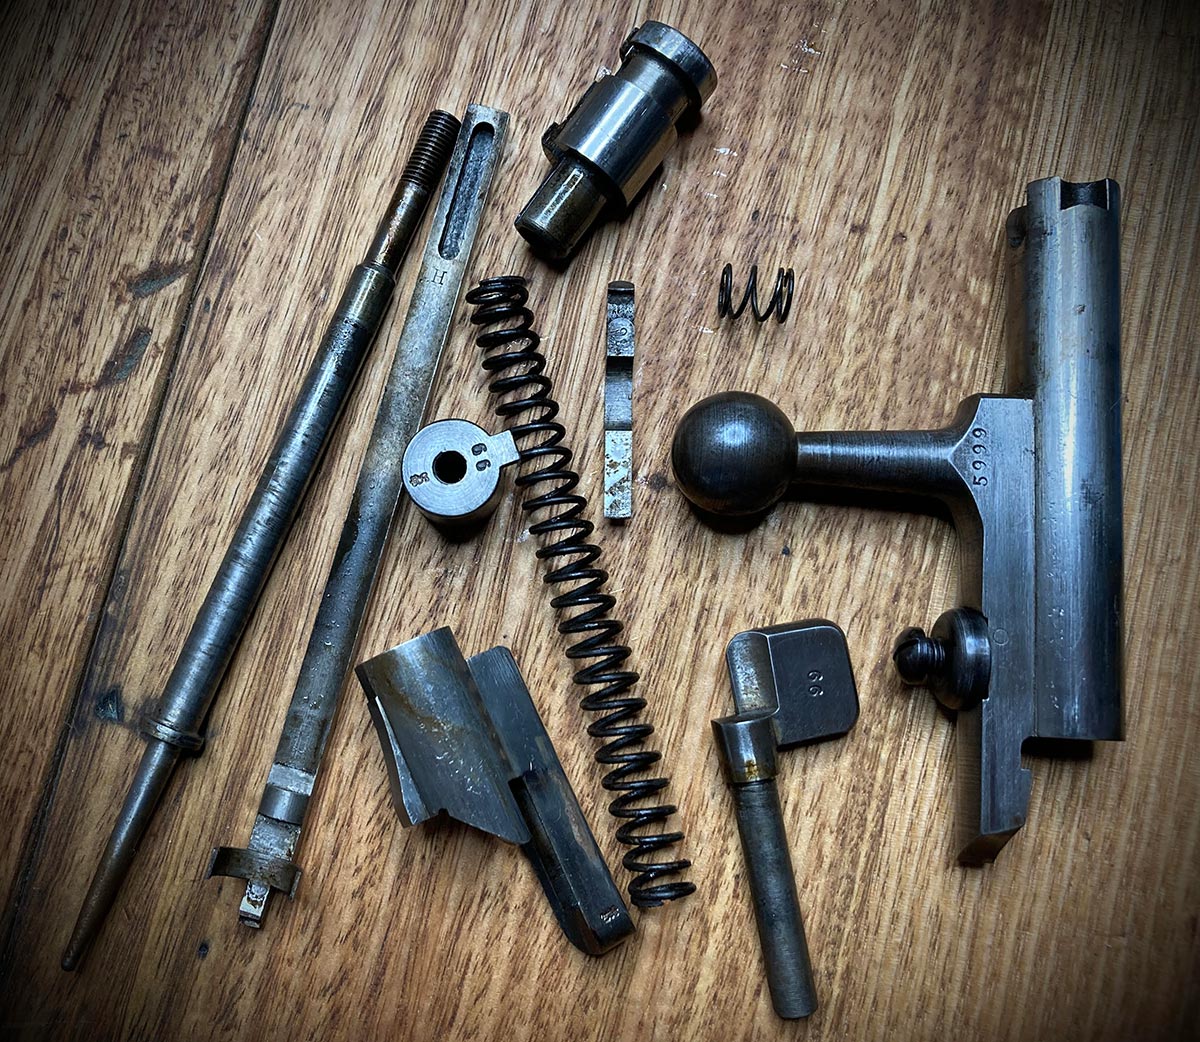
Now just slide the spring off the firing pin and you’re done. From here the parts can then be thoroughly cleaned, reoiled and reassembled in reverse order of the above instructions.